Tuesday, December 23, 2008

Remapping Menu key as Fn key

Info from following urls:
  http://humbledown.org/files/dunlug-keyboard-remap.pdf
  http://www.chuug.org/talks/tricks1a.pdf
  http://ubuntuforums.org/archive/index.php/t-820187.html
  http://www.linuxquestions.org/questions/linux-newbie-8/remapping-keys-using-xmodmap-home-key-652268/
  http://vim.wikia.com/wiki/Remap_the_Escape_key

    As mentioned in my previous post, I was trying to remap the Menu key as a Fn key. Well, I managed to do it, but it only works with the navigation keys. Eg.: Fn+Left=Home, Menu+Left=Home, Fn+Ins=PrtSc but Menu+Ins=nothing

    The command xmodmap was used to remap the Menu key as Mode_switch and the key mappings for the navigation keys were edited as well. A useful commandline utility I found was xev. It prints out the events in the X display system. Press Ctrl-Alt-T to open the terminal console and run "xev". If you press the Left key, you can see the keycode as 100 and the keysymname as Left. Now try with Fn+Left. Surprisingly, Fn has no keycode unlike the other modifier keys (Ctrl,Alt,Shift). Click in the terminal window and press Ctrl-C to exit. Now for xmodmap.

    Steps:
  1. Press Ctrl-Alt-T to open the terminal console.

  2. Type "sudo kwrite /usr/bin/remap-keys" to create a new bash script.

  3. Copy and paste the following into KWrite:

    #!/bin/bash

    # remap Menu key as a mode switch, like Fn
    # Need to remap Menu + up/down/left/right also
    # run xev to see info on each key pressed

    xmodmap -e "keycode 117 = Mode_switch"

    # = byItself withShift withModeSwitch
    xmodmap -e "keycode 100 = Left NoSymbol Home"
    xmodmap -e "keycode 102 = Right NoSymbol End"
    xmodmap -e "keycode 98 = Up NoSymbol Prior"
    xmodmap -e "keycode 104 = Down NoSymbol Next"

    xset -r 117 # Prevent the Menu key from autorepeating

  4. Save the file and exit back to the terminal console.

  5. Set the permissions to execute it by typing "sudo chmod 755 /usr/bin/remap-keys"

  6. Type "remap-keys" to run it. Use xev to test or try scrolling a document or webpage.

    If you wish to run it at startup, the fastest way would be to add "source /usr/bin/remap-keys" to the end of your .bashrc (see post on "Using Aliases to Make Life Easier").

    Keycode 117 is the keycode for the Menu key, gotten from running xev. Keycode 100 is the keycode for the Left key. The remapping "= Left NoSymbol Home" means when the Left key is pressed by itself, it means Left, Shift+Left=nothing, Mode_switch+Left=Home (in this case, Menu is our new Mode_switch key)

(^ v ^)

Saturday, December 20, 2008

Modifier keys

Info from following URLs:
  http://en.wikipedia.org/wiki/Computer_keyboard
  http://en.wikipedia.org/wiki/Windows_Key
  http://en.wikipedia.org/wiki/AltGr_key
  http://en.wikipedia.org/wiki/Space-cadet_keyboard

    I was surfing the Web last night on my Eee PC and thought that it would be easier to use the PgUp and PgDn keys if I could remap the Menu key as a Fn key. After searching around, I found info on xmodmap but could not understand what the Super-L and Hyper-L keys were.

    Did some "research" on our ubiquitous keyboard and decided to share the following info below, which will hopefully help in my quest to remap the keys later on :)

    This is a photo of my Fujitsu T4010 keyboard. I will be using the bottom row of keys to explain the special modifier keys. A modifier key when pressed in conjunction with another key, will perform a special operation (for example, Control-Alt-Delete) but rarely performs any function when pressed by itself.

(Bottom row, from left to right)
Key Description
Ctrl (left) ConTRoL key. A commonly used modifier key, so no elaboration here.
FnFunctioN key. This key is usually found on laptop keyboards and is used for various functions like adjusting volume, brightness, etc.
WinWINdows key.  Pressing and releasing it by itself opens the Start Menu in Windows, which can be invoked using Ctrl-Esc also.
Alt (left)ALTernate key. Commonly used to call up the application menu, eg. Alt-F to call up the File menu. The F10 key can be used to invoke the application menu as well.
SpacebarNot a modifier key, but the longest one on all keyboards :P
AltGrALTernate GRaphic key. On most keyboards, this functions as another Alt key. Used primarily to type characters unusual to the locale of the keyboard layout. If a key has a 3rd symbol on it, then AltGr can often be used to type it. As those using US keyboards increasingly needed the specific functionality of AltGr when typing non-English text, Windows began to allow all keystroke combinations involving AltGr to be typed by using Ctrl+Alt in its place. 
MenuAlso known as the Application key. Its primary function is to launch a context menu with the keyboard rather than with the usual right mouse button. This functionality can be invoked with the Shift-F10 shortcut also.
Ctrl (right)Typically, each keyboard will have 2 Ctrl keys, 2 Alt keys and 2 Win keys.


    This, is a Space-cadet keyboard used on MIT Lisp machines and designed by Tom Knight, which inspired several still-current jargon terms in the field of computer science and influenced the design of Emacs, a feature-rich text-editor popular with technically proficient computer users and computer programmers.

    It is said that with the combination of the Control, Meta, Hyper and Super keys, it was possible to type out over 8000 different characters on the Space-cadet keyboard, allowing users to type very complicated mathematical text. Many users were actually willing to memorise the command meanings of that many characters if it reduced typing time (this attitude shaped the interface of Emacs).

    The reason for showing this is that some keys in xmodmap are apparently linked to these, especially the Meta, Hyper and Super keys (on the left and right sides of the bottom row).
 
KeyDescription
HyperNot much info on this, except that it is a modifier key. 
SuperThis key is typically identified today with the Windows key or Apple logo key, although these may also be identified with the Meta key.
MetaSun keyboards continue to include it, marked as a solid diamond. May be considered equivalent to the Macintosh's command key. Emulated with Alt or Windows key on modern keyboards.
ComposeThe Compose key is not on the Space-cadet keyboard, but it's worth mentioning. Also known as the "Multi-key" on X Window System. A key designated to signal the software to interpret the subsequent keystrokes as a combination in order to produce a character not found on the keyboard.

(^ v ^)

Saturday, November 22, 2008

Creating a Password Dialog Script

Of recent, I had a few occasions whereby I wanted to lend my Eee PC to others to use or try out. I shifted all my programs from my resident SD Card to the EeePC SSD. That done, there was 1 concern left - the Menu Edit shortcut in my Favorites Tab, which was open for anyone to use.

Thus I created a script which would ask for a password before opening simpleui.rc for editing.

    Steps:
  1. Press Ctrl-Alt-T to open the terminal console.

  2. Type "sudo nano /usr/bin/MenuEdit-script" to create a new bash script.

  3. Type the following:

    #!/bin/bash
    password=$(kdialog --password "Please enter password to edit menu:")

    if [ $password = "mypassword" ]
    then
    /usr/bin/sudo /usr/bin/kwrite /home/user/.AsusLauncher/simpleui.rc
    fi

    exit 0

  4. Press Ctrl-O to save and Ctrl-X to exit.

  5. Type "sudo chmod 755 /usr/bin/MenuEdit-script" to set the permissions for executing it.

  6. Edit your Easy Mode GUI to add or edit the following desktop shortcut (if you do not know how, pls read the earlier posts on customising your Easy Mode GUI):

    <parcel simplecat="Favorites" extraargs="/usr/bin/MenuEdit-script"
    icon="asus_norm.png"
    selected_icon="asus_hi.png">
    <name lang="en">Menu Edit</name>
    </parcel>

  7. Press Ctrl-Alt-Backspace to refresh your XTerm display. The following dialog will pop up when you click on the Menu Edit shortcut.


(^ v ^)

Sunday, July 20, 2008

Replacing the SD Card popup dialog at startup

Info from the following URLs:
http://wiki.eeeuser.com/howto:tempdisabledevicedetection
Examples of awk: http://www.freeos.com/guides/lsst/ch07sec09.html

If you are like me who leaves his SD card permanently in the SD Card slot, you would probably be annoyed at having to close the popup dialog everytime the Eee PC starts up, asking you what action to take.


That will happen if you plug in a USB device permanently as well, as I have read. The Wiki URL above teaches how to disable the PlugNPlay popups permanently or during startup only. I don't recommend the former as the popups are a convenient way to access the device, especially given that the Linux file/device structure is different from Windows which some of us are used to.

The latter totally skips it, for about 40 seconds. What I have done is to use KDialog to create a passive popup (one without buttons) that will go away in 5 seconds. This is to reassure me that it has been loaded while still removing the hassle of clicking the popup away.

Disabling the SD Card popup dialog requires the renaming of /usr/bin/xandros_device_detection_dialog and creating a script in its place which will still redirect to it after 40 seconds. NOTE that the original file is a BINARY file and should not be opened in any text editor. If opened and saved, the file will be corrupted.
    Steps
  1. Press Ctrl-Alt-T to open the terminal console.

  2. Type "cd /usr/bin" to go to the directory. This will save us from typing out all the paths.

  3. Create a backup of the original file by typing
    "sudo cp xandros_device_detection_dialog xandros_device_detection_dialog.backup"

  4. Rename the original file by typing
    "sudo mv xandros_device_detection_dialog xandros_device_detection_dialog.copy"

  5. Create a new file in place of the old one by typing
    "sudo kwrite xandros_device_detection_dialog"

  6. Copy and paste the following into the file (both awk commands are continuous lines):

    #!/bin/sh
    #awk '$1 < 40 { exit 1 }' /proc/uptime && xandros_device_detection_dialog.copy "$@" &

    awk '$1 < 40 { system("kdialog --title \"SD Card / USB device loaded at startup\" --passivepopup \"This passive popup will disappear after 5 seconds.\" 5"); exit 1; }' /proc/uptime && xandros_device_detection_dialog.copy "$@" &

  7. Save and exit.

  8. Set the permissions to execute by typing
    "sudo chmod 755 xandros_device_detection_dialog"

  9. Restart your Eee PC and you should see the popup at the top-lefthand corner:


In the script above, the 1st awk command which is commented out, will simply skip the popup dialog. For the awk command, the only single quotes allowed are the two at the beginning and end, not even inside the curly braces. This got me stuck for a while. In the end I used \". system() is to run commands from the command line. KDialog cannot be run without it. There are basically 2 lines of code inside the curly braces, separated by the semicolon. The "exit 1" is to make sure the program exits gracefully.

(^ v ^)

Using KDialog to create pop-ups

Info from following URLs:
http://techbase.kde.org/Development/Tutorials/Shell_Scripting_with_KDE_Dialogs

Recently, the thought of putting a checklist for Audacity came to my mind. It is to remind the user (whether it be myself or the church PA crew who is recording the sermons) of 3 things: check the power, check the microphone volume, and save by using "Export as MP3".

I was thinking of printing a label and pasting it on the keyboard wrist rest area, but I decided not to spoil the surface, and so, the idea of pop-ups popped up :P

I used KDialog, a built-in KDE commandline application. You can either do a "man kdialog" to read the manual or go to the URL above. It's quite powerful and versatile, but I will just focus on a simple messagebox pop-up in this post.

I created a bash script which will pop up a message. When the user presses Enter or clicks OK, Audacity will be launched. So now, I have replaced the Audacity entry in my Easy Mode GUI to call this script instead of launching Audacity directly.

  1. Press Ctrl-Alt-T to open the terminal console.

  2. Type "sudo nano /usr/bin/audacity-checklist" to create the bash script.

  3. Type out the contents below.

    #!/bin/bash

    title="Audio Recording Checklist"
    msg1="1) Have you plugged in the power and SWITCHED IT ON?"
    msg2="2) Check that the microphone volume is at ONE-QUARTER of the maximum value."
    msg3="3) When saving, use 'Export as MP3', NOT 'Save Project As'."

    myMsg=$title'\n'$msg1'\n'$msg2'\n'$msg3
    nohup kdialog -msgbox "$myMsg"

    nohup audacity
    exit 0

  4. Press Ctrl-O to save and Ctrl-X to exit.

  5. Set the correct permissions to execute by typing
    "sudo chmod 755 /usr/bin/audacity-checklist"

  6. Try it out by typing "audacity-checklist". A pop-up will appear as following:

One new thing I learned while doing this script was the concatenating of strings. To combine msg1 and msg2 together and save as myMsg, type "myMsg=$msg1$msg2". There should be no spaces in between. To insert any spaces or text, insert them in single quotes. 3 examples are shown below:

msg1="a"
msg2="b"

#gives "ab"
echo $msg1$msg2

#gives "a b"
echo $msg1' '$msg2

#gives "S$a - b**"
echo 'S$'$msg1' - '$msg2'**'

(^ v ^)

Thursday, July 10, 2008

Using Aliases to Make Life Easier

Earlier on, I covered on my bash script that opens the SD Card folder in File Manager. Now, when I'm using the terminal console or shell, I need to go into the SD Card folder at times too. Instead of typing out the long path everytime, eg. cd /home/user/MMC-SD/Kingston, I tried writing a bash script that would change directories for me. That didn't work, as the script will go back to its original directory after exiting. The only way it could work, according to URLs I read up, was to type ". /usr/bin/myscript" or "source /usr/bin/myscript", using "source" and indicating the full path of the script, which IMHO, defeats the purpose of creating a shortcut bash script.

Then, I came across the topic of aliases, which as the name suggests, provide alternative names for calling commands. For example, you can use 'dir' in place of 'ls' even though 'dir' is a DOS command. This is because the alias has been set up in .bashrc. I have added 2 aliases, which I will use as examples later, that go straight into the SD Card folder and into a sub-sub-folder in my SD Card folder.

  1. Press Ctrl-Alt-T to open the terminal console. You should be in /home/user.

  2. Backup your .bashrc in case things mess up. Type
    "sudo cp /home/user/.bashrc /home/user/.bashrc.backup"
    (In case you haven't noticed, filenames starting with '.' are hidden. To see them, type 'ls -la')

  3. Open your .bashrc by typing "sudo nano /home/user/.bashrc".

  4. Go all the way to the bottom and add your aliases. This is what I have:

    #special alias by Zion to change dir to SD Card
    alias cdsd='cd /home/user/MMC-SD/SDHC4GB_Zn'
    alias cdeee='cd /home/user/MMC-SD/SDHC4GB_Zn/Docs/asus-eee'

  5. Press Ctrl-O to save and Ctrl-X to exit.

  6. Type ". /home/user/.bashrc" or "source /home/user/.bashrc" to reload .bashrc.

  7. Now, whenever I type 'cdsd' at the command prompt, it will change to the SD Card folder. The same goes for 'cdeee' (without the quotes).

(^ v ^)

Working startup and shutdown scripts in Eee PC

Info from following URLs:
xx http://www.debian-administration.org/articles/28
xx http://wiki.debianhelp.org/pmwiki.php/DebianHelpPages/DebianInitScripts
xx http://ubuntu.wordpress.com/2005/09/07/adding-a-startup-script-to-be-run-at-bootup/
** http://forum.eeeuser.com/viewtopic.php?id=21899
** http://wiki.eeeuser.com/howto:starting_services?s=fastservices
** http://forum.eeeuser.com/viewtopic.php?id=14692

Info on Linux bash scripting for fastshutdown.sh:
http://www.ibm.com/developerworks/library/l-bash-test.html
http://tldp.org/LDP/abs/html/loops1.html

Hmm...why the word "Working" in the title? Well, when I first searched the Net for adding boot time scripts to the Eee PC, I was led to those URLs above marked with 'xx'. Debian, and presumably Xandros (the OS in the Eee PC), uses a Sys-V like init system, where scripts are processed at runlevels (0..6,S). Scripts are placed in sets for each runlevel and placed in /etc/rcX.d (where X is 0 to 6, S).

I diligently followed all the instructions but nothing happened at all. Finally, after 2 days, I chanced upon the URLs above marked with '**' that told me that the Asus Eee PC uses fastinit which is a small program to handle all boot up sequences. NONE of the /etc/rc.d files will be processed %-O

The purpose of my searching on boot time scripts was to add timestamp logs for my Eee PC, to track the time used and thereby estimate battery consumption rate. First, I will step through the creation of a simple init script. All bootup scripts are located in /etc/init.d

  1. Press Ctrl-Alt-T to open the terminal console.

  2. Create an empty log file by typing
    "sudo nano /var/log/startup-shutdown.log"

  3. Type a description header if you want. Press Ctrl-O to save and press Ctrl-X to exit.

  4. Set the correct permissions so that the script can write to it.
    Type "sudo chmod 755 startup-shutdown.log"

  5. Type "sudo nano /etc/init.d/startup-shutdown-log" to create the init script.

  6. Type in the following:

    #! /bin/sh
    # /etc/init.d/startup-shutdown-log

    # Some things that run always.
    # Remove the comment below if you wish to run it
    # echo "Hello World!"

    # Carry out specific functions when asked to by the system
    # >> appends output to file
    # > overwrites file with output

    case "$1" in
    start)
      echo -e "Startup $(date)" >> /var/log/startup-shutdown.log
      ;;
    restart|reload|force-reload)
      #do nothing
      ;;
    stop)
      echo -e "SHUTDOWN $(date) \n" >> /var/log/startup-shutdown.log
      ;;
    *)
      echo "Usage: /etc/init.d/startup-shutdown-log {start|stop}"
      exit 1
      ;;
    esac

    exit 0

  7. Press Ctrl-O to save and press Ctrl-X to exit.

  8. Set the correct permissions to execute it by typing
    "sudo chmod 755 startup-shutdown-log"


Now, to include the script at bootup. Any scripts you wish to start at bootup should be placed in the file /etc/fastservices. The Eee PC fastinit will look in there and parse it line by line. Take note that comments are NOT allowed in this file.

Also, the names of the scripts you place inside MUST be found in /etc/init.d

  1. Press Ctrl-Alt-T to open the terminal console if you have exited the previous one.

  2. Type "sudo nano /etc/fastservices". This will create a new file if it's not there.

  3. One script name per line. Assuming it's a new file, my fastservices will have only one line:

    startup-shutdown-log

  4. Press Ctrl-O to save and press Ctrl-X to exit.

  5. Now whenever my Eee PC starts, it will run my script.

  6. How about stopping the script or running it at shutdown? You can edit /sbin/fastshutdown.sh and /sbin/fastreboot.sh to look in /etc/fastservices to stop each service inside during shutdown or reboot. Type "sudo nano /sbin/fastshutdown.sh". Here's how fastshutdown.sh would look like after all the editing (fastreboot.sh is identical):

    #!/bin/sh

    if [ "$1" = "--ask" ]
    then
      zenity --question && sudo $0
      exit $?
    fi


    if (test -f "/etc/fastservices")
    then
      for i in $(cat /etc/fastservices)
      do
        /usr/sbin/invoke-rc.d $i stop
      done
    fi

    [ `id -u` = "0" ] || echo "Must be root."

    /usr/bin/killall --wait usbstorageapplet

    /bin/kill -USR2 1

  7. When the Eee PC is shutting down, fastshutdown.sh will call your script with the argument 'stop'. What your script does when called with 'stop' depends on what you wrote in the CASE statement. Now, shutdown and startup your Eee PC and see the works. Do note that your script may be run AFTER everything else has been run, so if you open the timestamp log straight after booting up, it may not have been written to yet. To open the log, press Ctrl-Alt-T to open the terminal console and type
    "sudo nano /var/log/startup-shutdown.log".

(^ v ^)

Bash Script to open SD Card folder in File Manager

As mentioned earlier in the post on my Easy Mode GUI, I have an entry that goes straight to my SD Card folder in File Manager. Instead of a hard absolute link, eg. /home/user/MMC-SD/Kingston, I wrote a bash script to search the MMC-SD folder and open the first (and only) folder in File Manager.

I love programming and take it as my hobby. Not as a job though :P I started tinkering with computers in Secondary 1 after my uncle gave me an XT computer after my PSLE. I went to Informatics to pick up QBASIC when I was in Secondary 2, and it went on from there.
Sec 3: C
JC: Pascal, FoxPro, HTML
University: Scheme (a dialect of Lisp), Java, SQL, ASP, PHP, Prolog, SML

It's a lot of fun and satisfaction when the program gets running, so doing up all these bash scripts, though simple, are quite fulfilling for me too :)

A bash script in Linux (or UNIX) is basically like a batch file (.bat) in DOS. In a bash script, comments are preceded by #, except for #!/bin/bash. Assigning values to variables are done without the $ sign and there musn't be any spaces in between (a=2 correct, a = 2 wrong). This had me running in circles for quite a while. References to variables are done with the $ sign.

For the 'for' loop, there's no need for a semi-colon if the 'do' is not on the same line. Instead of letting the loop run forever, I inserted a break so that the loop will just run one time. This is assuming that there is one and only one folder in MMC-SD. The steps to creating the bash script are below.

  1. Press Ctrl-Alt-T to open the terminal console.

  2. Type "sudo nano /usr/bin/openSDCard" to create a bash script in /usr/bin. Nearly all bash scripts are placed there as it is in $PATH and therefore can be executed anywhere.

  3. Type the following:

    #!/bin/bash

    DIRECTORY="/home/user/MMC-SD"

    for file in $DIRECTORY/*
    do
    #for variable assignment, there cannot be spaces in between
    firstdir=$file
    break
    done

    /usr/bin/XandrosFileManager -caption File\ Manager -maximized $firstdir

    exit 0

  4. Press Ctrl-O to save and Ctrl-X to exit.

  5. Type "sudo chmod 755 /usr/bin/openSDCard" to set the correct permissions to run.

  6. To run, just type "openSDCard".

(^ v ^)

Wednesday, July 9, 2008

Installing Timidity and creating bash script to play MIDI files in GUI mode

Info from following URLs:
http://forum.eeeuser.com/viewtopic.php?id=3550

Timidity is a software MIDI synthesizer. The Asus Eee PC 701's soundcard does not have a hardware MIDI synthesizer, hence the need for this. Timidity basically converts MIDI files to WAV files real-time. You will need FreePats also, which is a set of sound fonts, for Timidity to use. To install both, press Ctrl-Alt-T to open the terminal console and type the following 2 commands:

sudo apt-get install timidity
sudo apt-get install freepats

Timidity is a console player, ie. it runs from command line. To run it in GUI, you can type "timidity -ia" at the command line (some websites suggest -ig but my Eee PC doesn't seem to have the gtk libraries required). The following steps show how to create a batch/bash file so that you can use it as a shortcut to associate with MIDI files via kcontrol or put under the Favorites tab. We will put the bash script in /usr/bin as it is in the default $PATH.

  1. Press Ctrl-Alt-T to open the terminal console.

  2. Type "sudo nano /usr/bin/timidity-gui" to create a new bash script file.

  3. Type the following:

    #!/bin/bash
    nohup timidity -iatv $@

  4. (Just some explanation: $@ allows the bash file to take in commandline arguments and pass them in. Without it, no files can be passed in to play. Without nohup, the program will close when you close the shell window that you ran it from. -iatv sets the interface to XAW interface, traces the playing via a virtual keyboard and shows more verbose info)

  5. Press Ctrl-O to save and Ctrl-X to exit.

  6. Set the correct permissions so that it can be executed. Type
    "sudo chmod 755 /usr/bin/timidity-gui"

  7. If you want to associate the file, you can type "sudo kcontrol" at the command line and go to File Manager -> File Associations. Alternatively, double-click on a MIDI file and specify timidity-gui when asked for the application.

(^ v ^)

Creating Easy Mode GUI Icons

Info from following URLs:
http://wiki.eeeuser.com/howto:customizeeasymodeicons
http://wiki.eeeuser.com/list:alternative_icons

In this 3rd post on the Easy Mode GUI, I will be covering the steps to creating your own icons. I have also made my icons available in the Resource Files section of this blog, EasyMode_icons.zip, which contains the icon background templates as well. The templates are 130 x 130, no longer the old 120 x 120. This is an update from Asus and the new size allows for 3 lines of text at the bottom. (if you used F9 to restore the factory settings, you can update the Asus Launcher from Add/Remove Software under Settings.)

For every icon, you need to make 6 copies: icon_norm.png which is your icon on a transparent background, one for each theme to replace the normal icon when you select/highlight it, and lastly an icon_hi.png which is the default highlighted icon.

I will be using mtPaint, which comes with the Eee PC (Learn -> Paint -> Paint). One good thing about this is that you can use your keyboard to move the crosshair/cursor for more precise movement.

First, you need to save the 6 templates below (or get it from Resource Files)


Blue (Accessibility) Theme

Silver (Business) Theme

Sunset (Home) Theme

Green (Student) Theme

Default highlighted background

Default transparent background


Secondly, we work on the picture you want to use in the icon. Go to Learn tab -> Paint -> Paint to run mtPaint. Open your picture. Go to Image -> Convert to RGB. If the Palette on the left does not show 256 colours, save your picture as a PNG file and open it again. Go to Image -> Scale Canvas and scale your picture to fit 80 x 80. If the width of your picture differs from the height, make sure the longer side is 80. If your picture background is transparent, click on the White colour in the Palette, select the Flood Fill in the Tools toolbar and click on the background. Save your picture.

Thirdly, we will copy and paste your picture into the 6 icon backgrounds. With your picture still open, press Ctrl-A to select all and press Ctrl-C to copy. Open accessibility_icon_background_hi.png and you will see this:

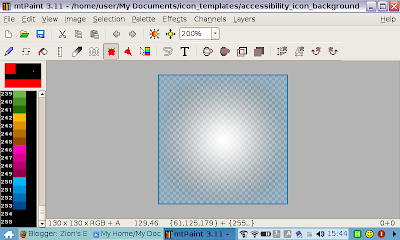
Press Ctrl-V to paste your picture and it will be centralised within the background. Use your UP arrow key to nudge it upwards till the y-coordinate of your picture (shown in the status bar) hits 6. This measurement was gotten from opening the other Eee PC icons. The result will look like this:


Fourthly, we are going to blend your picture into the background. Now, if your picture is a square or rectangle, you can just skip to the fifth step. This step is for those pictures, like my Baby Tux, that do not have a regular shape. Go to Palette in the menubar and select "Edit Colour A & B". Shift the Colour Editor window so that you can see your picture and the window. For colour A, click on the eyedropper button and click on the background of your picture, which should still have the selection border around it. For colour B, click the eyedropper button and click on one of the lighter squares in the icon background, preferrably near the corner. Once you are done, click OK. Now, go to Selection -> Mask Colour A,B. Your picture should now look like this.

(I zoomed from 200% to 100% so that it looks better here.)

Fifthly, right-click on the blank area outside the whole picture and press Esc. This is to remove the selection border and permanently merge the 2 pictures together. Go to File -> Save As and save your icon. You must retain the theme name in front and the "_hi" behind, so in this case, I would name my icon "accessibility_babytux_hi.png". For the other icon backgrounds, just open the background, press Ctrl-V to paste again, nudge the y-coordinate to 6 and repeat the fifth step. There will be no more need to do the masking anymore as it will be automatic. After saving all the new icons, the filenames (in my case) would be:

accessibility_babytux_hi.png
business_babytux_hi.png
home_babytux_hi.png
student_babytux_hi.png
babytux_hi.png
babytux_norm.png

Sixthly, it's time to apply the icons to your menu. Edit your menu (which has been covered 2 posts before) and type your picture's filename. An example for my babytux picture is shown below:
<parcel simplecat="Favorites"
extraargs="/usr/bin/kwrite
/home/user/MMC-SD/SDHC4GB_Zn/Docs/asus-eee/asus-eee_zionng.txt"
icon="babytux_norm.png"
selected_icon="babytux_hi.png">
<name lang="en">Eee PC Tips</name>
</parcel>

Lastly, you need to copy the new icon files to where all the icons are located. Open File Manager and go to the folder where your new icon files are placed. Press Ctrl-T and a shell will open in the same folder. Type "sudo cp *.png /opt/xandros/share/AsusLauncher" to copy all the files over. Type "exit" and press Ctrl-Alt-Backspace to restart your XTerm display (not your computer) and see the changes.

That's all!

(^ v ^)

Tuesday, July 8, 2008

My Easy Mode GUI - Favorites Tab

In this 2nd post on the Easy Mode GUI, I will be showing my customised Favorites Tab (as of the date of this post). A backup of my simpleui.rc is available in the Resource Files section of this blog. There is also an EasyMode_icons.zip which contains the blank background templates and the icons I created. More on icon creation in the next post.


My Favorites Tab


I'll go thru the icons one by one, from the top left to the bottom right. I won't be pasting the code here as I would need to replace all the < and > tag brackets. You can download my simpleui.rc.zionbackup, scroll to the bottom and refer to it while reading the explanations below.

  1. Menu Edit. This handy entry opens up the GUI config file, ie. simpleui.rc, for editing.

  2. SD Card. Everytime I wanted to access my SD Card, I would need to go to File Manager, My Home, MMC-SD, and double-click on the folder with the SD card's name. I could have added a hard link with an absolute path to my current SD Card, but what if I put in another card with a different name? So I wrote a bash script that would search the contents of MMC-SD and go to the 1st folder (which would be the only folder) and open it in File Manager. Then I added an entry in my Favorites tab that would run this bash script. I will probably cover bash scripting in another post.

  3. KWrite. This entry opens up KWrite, a GUI text editor that comes with the Eee PC. I modified the icon from the existing one hidden in /opt/xandros/share/AsusLauncher as the picture was in the middle and covered the words. The modified icon is in the EasyMode_icons.zip as well.

  4. Timidity MIDI. This is a MIDI player. The actual program runs in console mode, so I had to create a bash file to run it in GUI mode. More on Timidity in another post.

  5. Audacity. My MP3 recording software. Think enough has been said in earlier posts :P

  6. JSword. This is a Bible software from The Sword Project (www.crosswire.org). There is a Debian distribution for BibleTime, but I opted for the Java Bible Desktop for the convenience of installation. To run it, I went to www.java.com to download the Linux RPM for the latest JRE. I don't really use this for my reading; it's more so for searching.

  7. Eng/Chi Bible. This is an offline archive of the entire KJV English Bible and CUV Chinese Bible which I downloaded from www.ccim.org. The layout is easier to navigate and read as compared to JSword, save that there is no search engine.

  8. RHC (Revival Hymns and Choruses). This is an offline MIDI compilation of all the hymns in my church worship hymnal. Anytime I need to find out the tune for a particular hymn, I can just click on it and listen. This was the main reason why I installed Timidity also.

  9. TSMS (Then Sings My Soul). This is an offline MIDI compilation of all the songs in my church fellowship songbook (it is used only in the fellowship group, not during the worship service). As with RHC, it comes in handy when I need to play the tune for an unfamiliar song. I have the MIDI files on my Nokia E51 handphone as well.

  10. Daily Readings. This is an Excel file which contains a schedule for reading the Bible through in one year. When the year is changed, all the dates will be updated to show the correct day of the week. The file is opened in read-only view to prevent accidental changes. It's available in the Resource Files section of this blog.

  11. Timestamp Log. Earlier on, I had added startup and shutdown scripts on my Fujitsu T4010 to track the battery consumption rate. That was in Microsoft Windows. I decided to do the same for my Eee PC - it took me 2 days to get it right (will share on this in another post). This entry opens up the log file for viewing. The bash script, startup-shutdown-log.sh, is in the Resource Files section of this blog. I will cover more on adding startup and shutdown scripts later.

  12. Eee PC Tips. Before this blog, I noted down all my work in a text file. The entries got more and more and I decided to share them on a blog instead. This entry is an offline copy of the text file and comes in handy when I need to refer to it in the absence of an Internet connection.

  13. Music Theory. I have yet to find a simple MIDI composer software for my Eee PC. The ones I read about, like WINE, talks technically about setting up Timidity as a server and stuff, and I do not want to keep eating into the SSD disk space. My main reason for a MIDI composer software for my Eee PC was just to play certain notes for choral pitching or guitar tuning purposes. If I need to compose a full MIDI file, I would probably use Anvil Studio on my Windows desktop PC as I'm used to it. In view of all these, I created a simple webpage with MIDI files for 3 octaves of notes, plus some other info. So when I need to hear an 'A' note to tune my guitar, I would just need to click on the link to play it. This entry in my Favorites tab is an offline copy, which I've put in my Nokia E51 handphone as well, for convenient reference. The files are available in a zipped file in the Resource Files section of this blog.
(^ v ^)

Customising the Easy Mode GUI

Info from following URLs:
http://wiki.eeeuser.com/howto:customizeeasymode

This is what makes the Asus Eee PC so fun - customisation. Initially, when I installed Audacity, there wasn't any shortcut created on the "desktop". I had to run it from the terminal console. I looked up the topic and found the above URL. I started using computers during the XT and DOS age, so all the terminal console work was like back to the good old times for me. Fyi, I still do my webpages and PHP programming in NotePad. My principle is that every computer will have NotePad but not every computer will have an IDE editor or DreamWeaver or FrontPage.

I've spent quite some time on customising the Favorite Tab in the Easy Mode GUI, so this topic will span about 3 posts. From simple adding of shortcuts, I have gone on to bash scripting to customise my Eee PC further. For this post, I will just cover how to edit the Easy Mode GUI.

  1. Press Ctrl-Alt-T to open the terminal console.

  2. Type "mkdir /home/user/.AsusLauncher/" to create a hidden folder in your home dir.

  3. Type "cp /opt/xandros/share/AsusLauncher/simpleui.rc /home/user/.AsusLauncher/simpleui.rc.old" to backup the GUI config file.

  4. Type "cp /opt/xandros/share/AsusLauncher/simpleui.rc /home/user/.AsusLauncher/simpleui.rc"
    to copy the GUI config file over.

  5. Type "sudo kwrite /home/user/.AsusLauncher/simpleui.rc" to edit the GUI config file. KWrite is a GUI text editor whereas "nano" is a console text editor.

  6. The layout is like an XML document. All the shortcuts for the Favorites tab are at the bottom of the file as that is the last tab.

  7. A handy entry to Favorites to edit the GUI config file:
    <parcel simplecat="Favorites"
      extraargs="/usr/bin/sudo /usr/bin/kwrite    /home/user/.AsusLauncher/simpleui.rc"
      icon="asus_norm.png"
      selected_icon="asus_hi.png">
      <name lang="en">Menu Edit</name>
    </parcel>

    Adding Website Links:
    <parcel simplecat="Favorites"
      extraargs="/usr/bin/firefox http://www.eeeuser.com"
      icon="web_norm.png"
      selected_icon="web_hi.png">
      <name lang="en">Eee User</name>
    </parcel>

  8. Make sure it is "extraargs=" and NOT "shortcut=". The former refers to a command execution whereas the latter refers to a .desktop file.

  9. After you are done, save and exit. Press Ctrl-Alt-Backspace to restart the GUI (but not the computer) to see your changes.

(^ v ^)

Using Nokia handphone as a modem

Info from following URLs:
http://www.myasuseee.com/3g-on-the-asus-eee-using-an-lg-ku250/

At the beginning of this year, my phone was a Nokia 6120 Classic. Due to my reservist training, I sourced for a phone that had the same features BUT without camera, which was disallowed in camps. Now I'm using a Nokia E51 (the cameraless version) which has the same features as my previous phone PLUS WiFi.

Both handphones had a mini-USB port and a micro-SD slot, into which I put in a 2GB card. When connected to a computer via a USB cable, they could either act as a thumbdrive or a modem. I was trying out the modem feature on the EeePC and was surprised that it actually worked. Now I can be assured of an Internet connection in the absence of any wireless or wired network.

In this post, I will be using my Nokia E51 and M1 (MobileOne, my service provider) for the example. For those who are using other phones with the same features, it should provide a rough guide. Those using the StarHub Huawei 3G modem can just plug in and set up a new Network Connection under Network in the Internet tab. The Eee PC will detect it as a 3G modem.

  1. Connect the Nokia E51 phone to the Asus Eee via the USB port. A dialog will pop up on your phone asking which USB mode you want to use. Choose "PC Suite".

  2. Create a dialup profile under Network Connections using your 3G phone as the dialup modem. Usually the 3G- or GPRS-enabled phones won't appear under the 3G/HSDPA modem list, even when plugged in. They will be detected as dialup modems though.

  3. For the next 2 steps, it would only be dialup1 if this is the 1st time you are setting up a dialup modem. If you set up a 2nd second dialup modem, it would be "dialup2". You can go to Network Connections, right-click on the connection you just created, go to Properties and look at the ID.

  4. Press Ctrl-Alt-T to open the terminal console.
    Type "sudo nano /etc/ppp/peers/dialup1" to edit it such that the last few lines appear as follows:

    modem
    /dev/ttyACM0
    460800

  5. Press Ctrl-O to save and Ctrl-X to exit.

  6. Type "sudo nano /etc/chatscripts/dialup1" to edit it such that it looks like the following (I'm using M1, so the "access-point-name" will be "sunsurf" instead. Leave "IP" as it is):

    ABORT VOICE
    ABORT BUSY
    ABORT "NO CARRIER"
    ABORT "NO DIALTONE"
    ABORT "NO DIAL TONE"
    TIMEOUT 120
    "" ATZ
    OK ATV1E0
    OK AT+CGDCONT=1,"IP","access-point-name"
    OK ATD*99#
    CONNECT \c

  7. Press Ctrl-O to save and Ctrl-X to exit.

  8. Go to Network under the Internet tab, right-click on your connection and choose Connect. Click on the Details button and wait for it to be enabled.

(^ v ^)

Synaptic Install Errors

Info from following URLs:
http://wiki.eeeuser.com/addingxandrosrepos
http://wiki.eeeuser.com/howto:unable_to_tparse

In my post on installing Audacity, the program used to install it was Aptitude (apt-get). Synaptic is also a package manager, linked to apt-get, but with a GUI. To run it, press Ctrl-Alt-T to bring up the terminal console and type "sudo synaptic".

Some users have reported the following (or similar) errors from Synaptic / Aptitude:
E: Unable to tparse package file /var/lib/dpkg/status (2)
E: Unable to lock the download directory

    There appears to be two solutions:
  1. Press Ctrl-Alt-T to bring up the terminal console.

  2. Make sure Synaptic is closed and run "sudo dpkg --configure -a"

  3. Within Synaptic, run Edit / Fix Broken Packages twice.
    After each of these, it would be advisable to ensure Synaptic is closed, and then run
    "sudo apt-get update" to update the package list.

Note: the error appears to be caused by use of the search facility within Synaptic. To resolve this, don't use the search and manually scroll through the sections / packages until you find what you need. Then add them in the normal way and you should be able to avoid the errors.

(^ v ^)

Monday, July 7, 2008

Audacity Recording Tips and Crash Recovery

Info from the following URLS:
http://www.audacityteam.org/wiki/index.php?title=CrashRecovery
http://www.mesw.de/audacity/recovery/

Continuing from my previous post on installing Audacity, a thought later came into my mind - "Why not just use the Eee PC to do the recording?" There would be no need to charge any rechargeable batteries, no fear of the batteries running out, no need to worry about exceeding disk space, plus recordings could be recovered should the device crash and most importantly, there would be a spectrogram to show whether anything is being recorded DURING the recording.

I just tried it for the first time last Sun, 06 Jul 2008, with 1 person from the church PA crew manning it. A line-in cable connected to the mixer was plugged into the EeePC's microphone port. Here are some tips that I have learnt:

  1. Remember to plug in AND switch on the power supply. At the end of the service, my friend told me that the Eee PC suddenly shutdown by itself. I checked and found out that I had plugged in the power supply but forgot to switch it on. More on crash recovery below.

  2. Adjust the microphone volume to ONE-QUARTER of its maximum volume. When I first tried it on the PA system, I turned on my Eee PC mic volume full, and the recording was full of distortion and background noise. I thought it was finished. Later, I played with the Sound Recorder provided under the Play tab and discovered the Input Level which pointed out the problem. NOTE: When you mute and unmute your volume, it seems that both the speaker and mic volume are reset to zero. Always do a check before you start your recording.

  3. Though you can export as an MP3 file, the recording is in uncompressed WAV format. For 60 mins of recording, you would need roughly 900MB of disk space to store the temporary files. There's no way my 4GB SSD with only 1.39MB available can ever take that, so I set the temporary directory to my SD card. You can do that by going to Edit -> Preferences -> Directories and choose a folder in your SD card to store the temporary files.

  4. Crash Recovery. Continuing the story from the 1st tip, I switched on the power supply and my Eee PC, and went into Audacity. It asked me whether I wanted to delete the temporary files. I chose NO. I then went into the temporary directory and found 638 .au files inside, about 1MB and lasting 10 secs each. If there were only a few files, I could combine them by cutting and pasting, but 638 files?? I searched and found the URLs above. The Aud_Recover command-line utility didn't work on my Eee PC and my Windows desktop PC. I gave up installing the Audacity Recovery utility on my Eee PC as it involved installing wxPython, glib, gtk+ and PyOpenGL, of which there were no simple installation instructions or packages. I almost gave up on recovering the recording. I decided to give it a last shot. I copied the 638 .au files to my external hard disk, connected it to my Windows desktop PC, installed the much-simpler-to-install Windows version of the Audacity Recovery Utility and after a few clicks and some processing time, the recording was recovered! It was not the complete sermon as the Eee PC had shutdown before it ended, but otherwise, it was a good recording. The Audacity website (audacity.sourceforge.net) says that Audacity Beta 1.3.2 and later has automated data recovery. My current version is 1.2.4 and there is no Debian or Eee PC distribution yet for the 1.3.x versions. Once they are out, I'll probably upgrade it. Despite all these, it still proved better than the MP3 player because at least there were temporary files to recover from.

(^ v ^)

Installing Audacity (WAV/MP3 recording software)

Info from following URLs:
http://audacity.sourceforge.net
http://asuseeehacks.blogspot.com/2007/11/installing-audacity-on-eee-pc.html
http://www.downloadsquad.com/2007/11/06/eee-pc-tips-a-crash-course-in-linux/
http://www.newlinuxuser.com/wp-content/uploads/libmp3lame.so

One of my reasons for buying the EeePC was that it could function as a lightweight portable backup device. In the church I attend, I would hook up my Elson EM-200H (128MB) MP3 player to the mixer in the PA system to record the sermons. When we went for church camps, I would do the same as well, lugging along 4 rechargeable AAA batteries, the charger AND my 2kg 12.1" laptop with its own accessories. The laptop was for the sole purpose of backup.

Besides backup, I needed software to amplify the finished recording to see if anything was recorded. There was no spectrogram on the MP3 player to indicate that and a few camp messages were found to be unrecorded. My laptop had Nero 7 Wave Editor installed (bought it online). To equip my Eee PC, I installed Audacity. There is currently no Eee PC distribution, so I had to install the Debian package instead.

  1. Press Ctrl-Alt-T to open the terminal console.

  2. Type "sudo nano /etc/apt/sources.list" to edit your software package repositories list.

  3. Add "deb http://http.us.debian.org/debian/ stable main" to the last line

  4. Write to the file by pressing Ctrl-O

  5. Exit by pressing Ctrl-X

  6. Type "sudo apt-get update" to get an updated list of available packages.

  7. Type "sudo apt-get install audacity" to install Audacity (select yes for all questions).

  8. Type "sudo audacity" to launch the program. (The "sudo" is to give permissions for the program to save the file later)

To edit and save as MP3s, download libmp3lame.so (available on this blog under Resource Files) and go to Edit, Preferences, File Formats, MP3 Export Setup. To save, use Export, not Save Project.

(^ v ^)

Thursday, July 3, 2008

SD Cards

Info from following URLs:
http://forum.eeeuser.com/viewtopic.php?id=9523
http://forum.eeeuser.com/viewtopic.php?id=954
http://wiki.eeeuser.com/howto:format_sd
http://wiki.eeeuser.com/howto:sd_permissions

For starters, let's assume our SD Card is named "Kingston". According to the Asus manual, you can access it in the File Manager via My Home -> Kingston. You will then see a folder named "partition1" where its contents are.

In my case, however, it's different. There is a permanent folder under My Home named MMC-SD (a symbolic link in fact). I would need to go into MMC-SD to see the "Kingston" folder. When I open the "Kingston" folder, I will see the contents of the card but no "partition1". A screenshot taken using the Screen Capture utility (Work tab -> Accessories) is shown below:


In the 1st scenario, store your files inside partition1. In my scenario, the 2nd one, I would store my files in the SD Card folder itself, not MMC-SD, else the files will be on the Eee PC SSD.
    To format an SD Card:
  1. Press Ctrl-Alt-T to open the terminal console.

  2. Unmount the SD Card drive by typing
    "sudo umount /dev/sdb1"

  3. Format it as a MS-DOS FAT32 partition by typing
    "sudo mkdosfs -F 32 -n NAME /dev/sdb1"
    where NAME is the name you want to give to the SD Card.

  4. Type "exit" to close the console window

  5. Remove and insert the SD Card again and see if it appears correctly in MMC-SD

(^ v ^)

General Tips

  1. Although the hard disk space on the Asus Eee PC 4G 701 is 4GB, the actual usable space is 1.39GB. Many websites have recommended enabling Full Desktop Mode by installing kicker and kmserver, but IMHO, there's no need to waste the precious disk space on that. The Easy Mode GUI is good enough. Get a 4GB or 8GB SDHC Card and leave it inside the SD slot, acting as a 2nd hard disk. Store your documents there and leave your SSD for programs.

  2. The resolution on the Asus Eee PC 4G 701 is 800 x 480. Sometimes you will find that certain windows exceed the screen, especially program settings, options and preferences. To move the window around, press and hold the Alt button and use your left mouse button to drag it around.

  3. You can switch between English and Chinese input by clicking on the Input Method icon in the system tray. It is only enabled when you are in a text editor program or in a browser.

  4. You can access the Task Manager by pressing Ctrl-Alt-Del, Fn+F6, pressing the Power button upon which a menu will appear, or clicking on the green squarish SOS icon in the system tray. It comes in useful when you need to kill off apps that have hanged.

  5. A convenient way to shutdown is to press and hold the Power button for about 6 seconds.

  6. Press Ctrl-Alt-T to bring up the terminal console. It is like the DOS command prompt and starts in your $HOME directory, ie. /home/user.

  7. When using File Manager, press Ctrl-T to bring up a shell. It is like the DOS command prompt and starts in the directory opened in the File Manager.

  8. To save power, adjust your LCD Brightness, mute or lower your speaker volume and turn off your wireless when not in use. You can disable the webcam via the BIOS during startup. This will save some power also. The Webcam utility and Skype will automatically switch it on when needed. Currently my Asus Eee PC can last about 2 hours when I'm surfing the Net with it.

  9. The operating system on the Asus Eee PC is Xandros, which is a fork of the Debian distribution of Linux. It uses XTerm and KDE. In the event that you have messed up the whole operating system, you can press F9 during the bootup and restore all the factory settings. This is possible as the original programs and OS have been hidden on the SSD, which also explains why you will not recover any space on the SSD even if you remove any of the original programs. Note that if you have installed Windows XP, the hidden image would have been deleted.

  10. Last but not least, bring it around and have fun! There's no limit to what you can do with the Asus Eee PC. Explore the possibilities!

(^ v ^)

Wednesday, July 2, 2008

My Asus Eee PC

The Asus Eee PC was officially launched at the SITEX PC Show in Singapore on Sat 01 Dec 2007. The edition sold was the Pearl White 4GB 701 series, with the webcam, at the price of S$598. When I went to the PC Show the next day, I was told that all stock had run out on the 1st day of the launch.

I went to Sim Lim Square to ask around, only to be told that there was no stock islandwide. I later found out that stock would come in during the 1st week of January 2008. I went back to Sim Lim Square on Wed 02 Jan 2008 and got to buy my Asus Eee PC from AAAs Com Solution Pte Ltd (#04-61), which happened to be the 2nd last piece. The last piece in that shop was bought by another customer 5 minutes later :P

Model: 701 (EEEPC4G-BK005)
Serial: 7COAAQ050042
Description: Eee PC 4G, Galaxy Black, Linux, 4GB SSD, 512MB DDR2, Intel Mobile CPU & Chipset, WiFi 802.11b/g, 10/100 Mbps Ethernet, 0.3M Camera, sleeve

I bought it with the original specs, not upgrading it to 1GB RAM or switching to Windows XP. I wanted to see if it could function as well as a laptop using Linux, 512MB RAM and 4GB hard disk space. If it could, it would be an affordable alternative for poor students who can't even afford a desktop at home. It has not disappointed me thus far and has even exceeded my expectations. Asus really did an excellent job in creating a world first - low price, superb quality and performance. As its motto goes, "Rock Solid, Heart Touching" :)


I labelled my Eee PC the next day. I had wanted to use a yellow label but the only colour left was green. On hindsight, green looks better on black. Shown above are the accessories, minus the permanent marker pen :P


In open mode. In addition to my Eee PC, I bought a 4GB mini SDHC Card for S$52 and a short USB cable. I had wanted a full size SD Card but the shop did not have it. The short USB cable was for convenience, mainly to connect to my Nokia handphone to use it as a thumbdrive or modem.


The other mobile device I have, is my trusty Fujitsu Tablet PC T4010, which I bought in Feb 2006 for S$3000 (paid in instalments). Together, they are like the Dynamic Duo, Batman and Robin :)


Another comparison of the two of them, with my Tablet PC in slate mode.


(^ v ^)